
Summer 2025
Summer 2025
By Warren Bracewell
I was always a visual amateur astronomer in the past. I purchased a 10” Z-scope Dobsonian when I was in my 20s and that was what I used through most of my life until I retired, moved to Bryan, and joined the BVAC. I was never into astrophotography mainly because I didn’t have the time, patience, and money to pursue that part of the hobby. I loved looking at the fantastic pictures in the astronomy magazines, but could never do that with a manual tracking scope. After I retired and joined the club, I decided to get something that would track and could do some astrophotography. I purchased a Celestron EdgeHD 1100, not really realizing the weight and cumbersomeness of this beast. I already had a Canon EOS T7i camera, so I thought that I could just snap it on and away I would go with astrophotography. Boy, how naïve was I? Exact polar aligning, framing, setting hysteresis, guide camera, learning capture programs, taking flats, darks, lights, and processing left me frustrated and wanting to just go back to visual only. I finally got an Orion Skyquest XT12G tracking Dobsonian, mainly to use at outreaches so that I wouldn’t have to continually keep moving the scope. That led me to tinker with a phone mount and I used it to take some decent shots of some of the brighter objects in the sky.
I first read about the ZWO Seestars in the astronomy magazines and thought that they were pretty interesting. I was hesitant to jump in and get one until I saw some reviews. One of the club members, Lee Smith, purchased the Seestar S30 and showed me some pictures he took with it and that and the cost convinced me to give it a try. The price of the S30 was around $300, while the S50 was around $500. I started seriously reviewing the specs on the S30 versus the S50 and decided that even though the S30 has a wider field of view, the overall performance of the S50 was more to my liking. So, my 70th birthday present was a ZWO Seestar S50.
Both of the Seestars have the same camera in them. It is an older Sony IMX 462. It has a 1920mmX1080mm chip with a pixel size of 2.9µm. The S50 has a 50mm lens thus giving it the name. It has a 250mm focal length, which makes it an F/5 scope and a field of view of 0.7X1.2º. I guess they used an older chip to keep the price down.
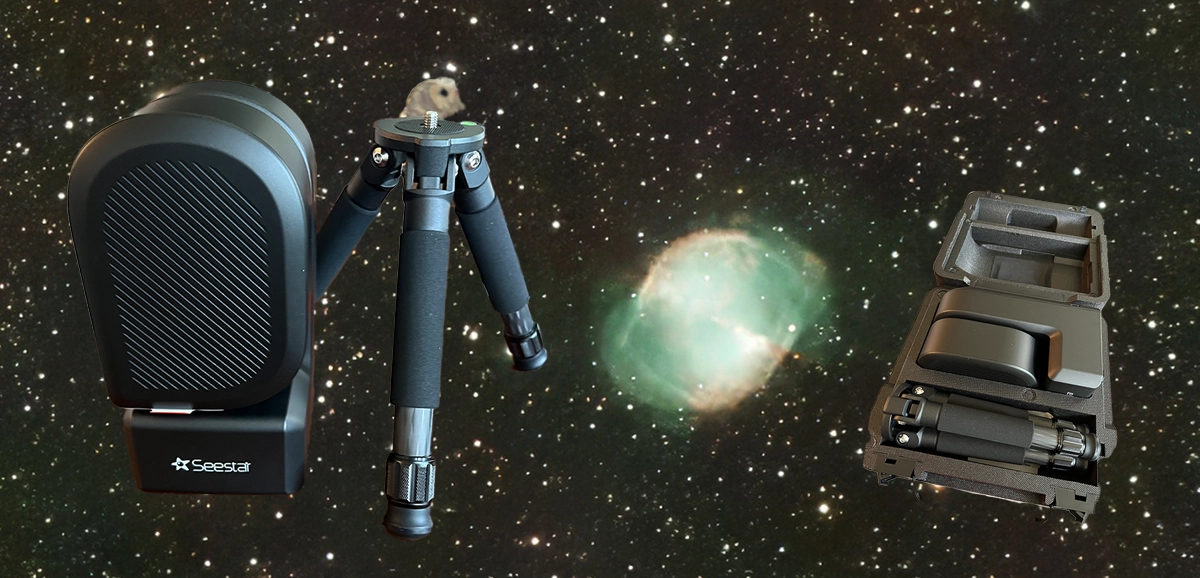
It comes with its own carrying case, which also contains a mini tripod and a solar filter. The camera itself weighs around 2.5kg. It has a built-in 64gb storage with a 6000mAh battery that lasts around 6 hr. under normal usage. It has a built-in 2.4Ghz or 5Ghz wi-fi that talks directly to your phone or tablet using Seestar’s APP.
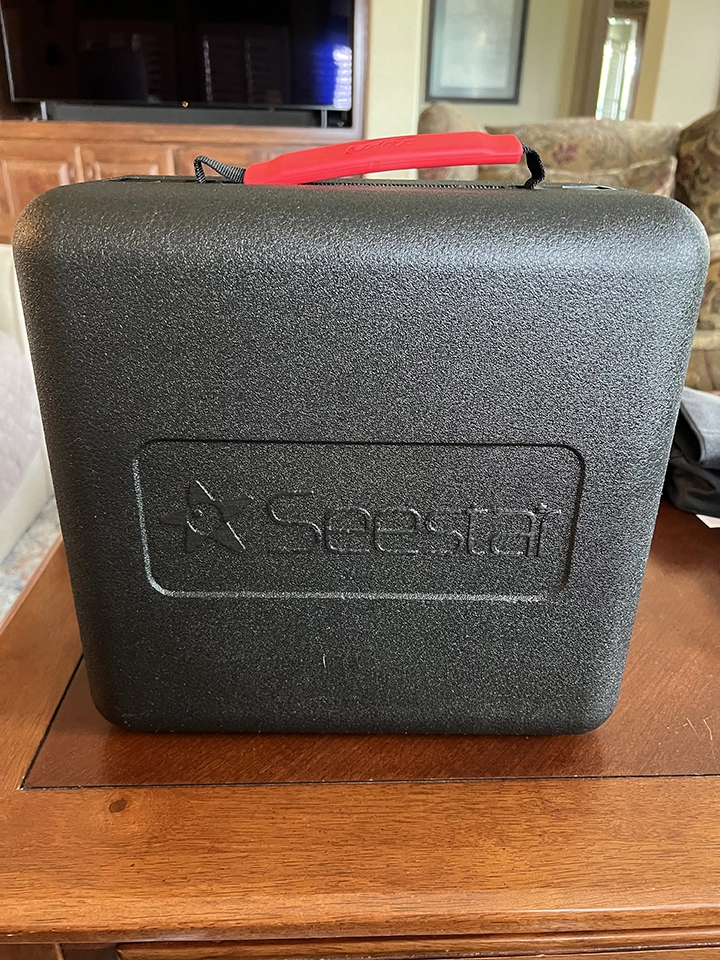
Seestar S50 case
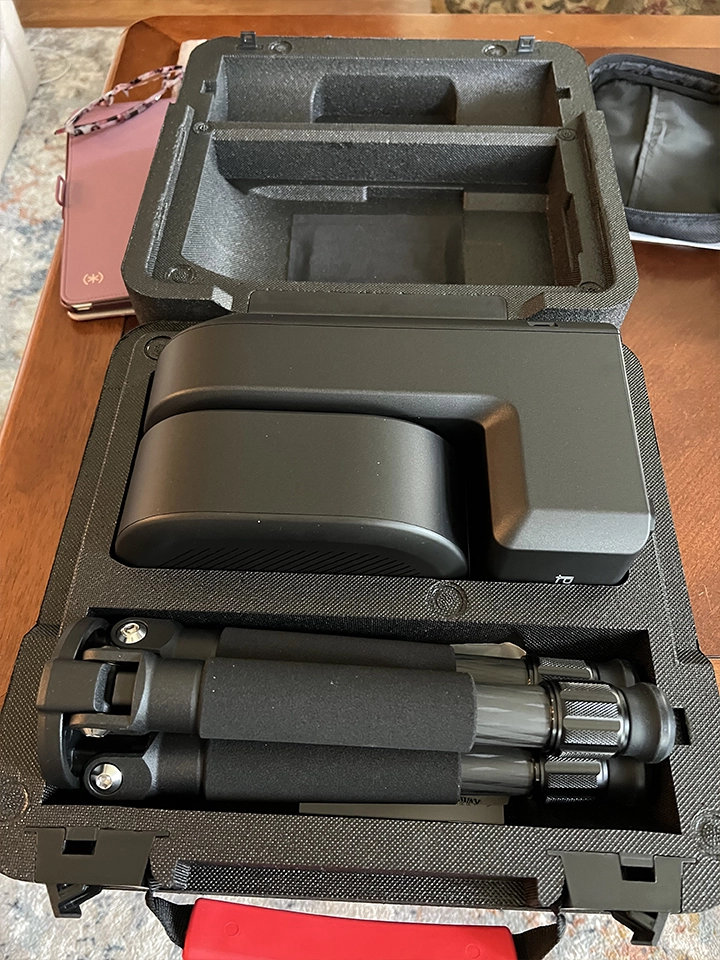
Seestar S50 contents
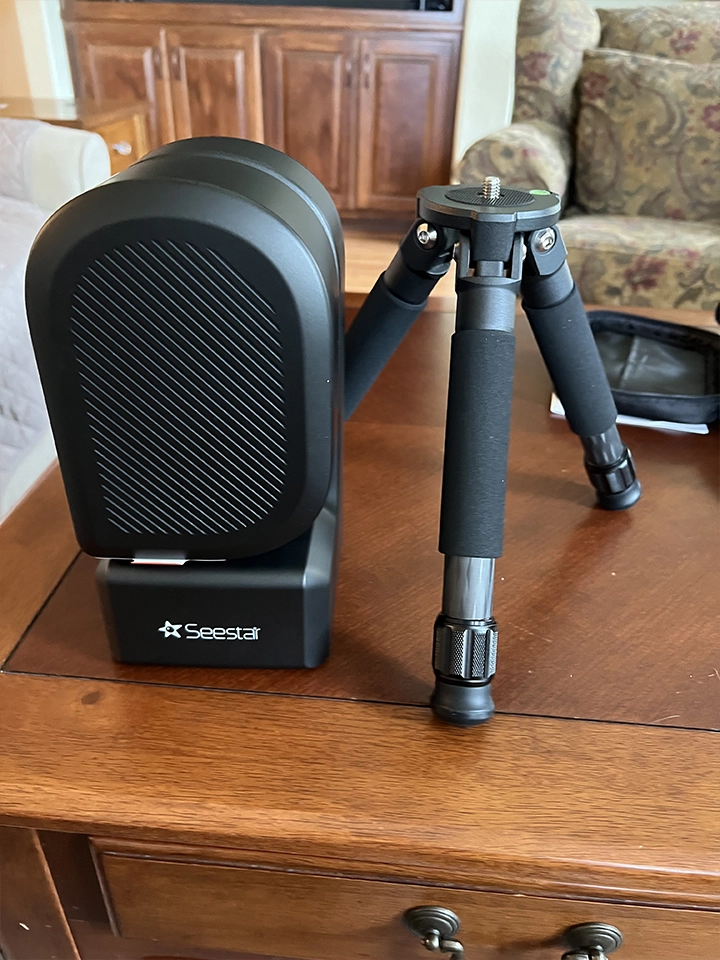
Seestar S50 telescope and tripod
After pushing the power button, the APP has all of the controls on it. You link up with the wi-fi and hit connect. You can then open the telescope arm. The APP has all kinds of good information on it. It has tutorials for just about any task you want to perform. It has a tab for stargazing, Solar System, and Scenery. Yes, it will do daytime photography and videos. The APP also has a built-in sky atlas where you can go to an object or you can also set up a plan of objects you would like to see that night.
When you select an object, the Seestar uses plate solving to locate and center the object. It will then do an auto focus. You can adjust the focus and position yourself if you like. You can also turn on a built-in dew heater and light pollution filter. Once it finds the object, it starts live stacking at 10 seconds per frame. It will also do 20, 30, and seconds per frame, but that is not recommended unless in equatorial mode. Yes, you can put the camera on an equatorial mount or a tripod and go to equatorial mode. One of the reasons I bought it is because it automatically processes all of the images itself once you stop the imaging and gives you a final image. You can also have the S50 save each individual frame in FITS format so that you can stack them yourself later. The S50 creates its own dark frame and allows you to take a flat frame to enhance the processing.
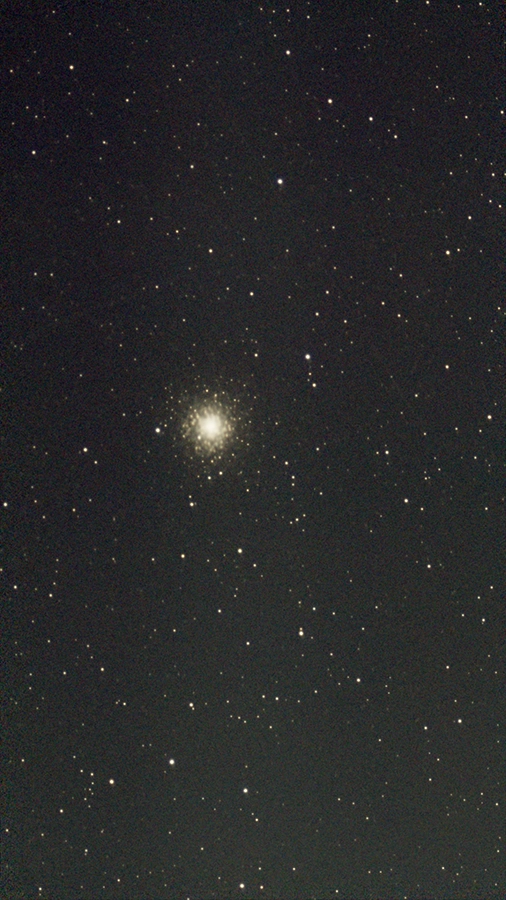
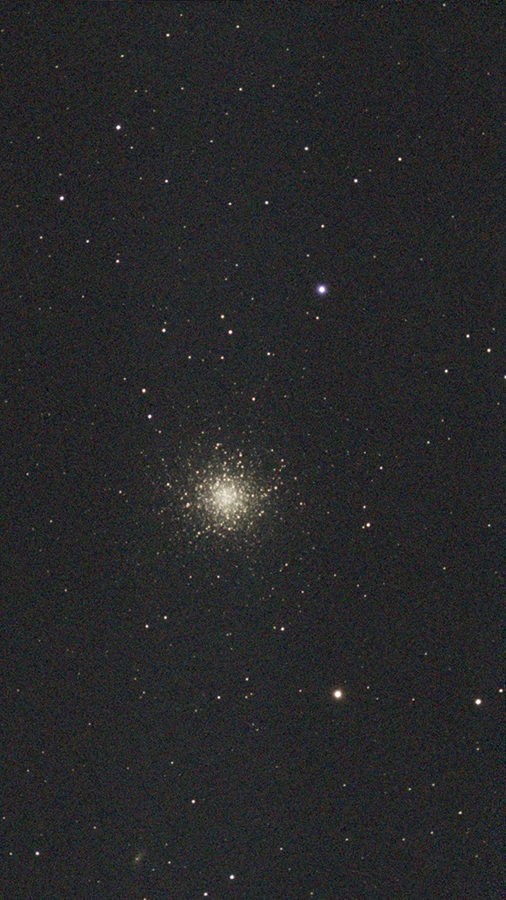
So far, I have imaged the sun using the included solar filter and the moon. I did a couple of short live stack events with M13, M02, and M51 just to test it out and was pretty pleased. It processed out a couple of satellite trails in just a few images. I recently set it up in EQ mode and tried for 20 second exposures on M27 and it did great. Anyway, that’s my review so far. As I get more familiar with the camera, I can post some better pictures. Bye for now.
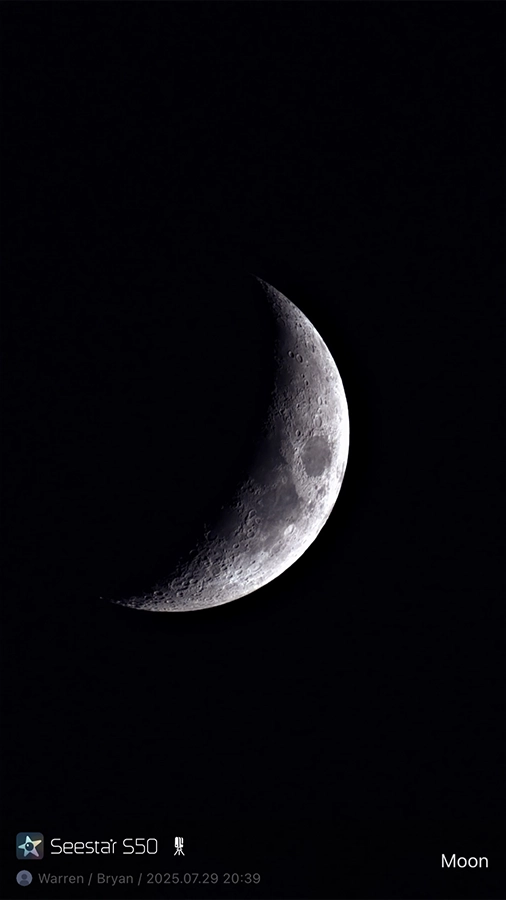
Moon

Sun
M2
M13
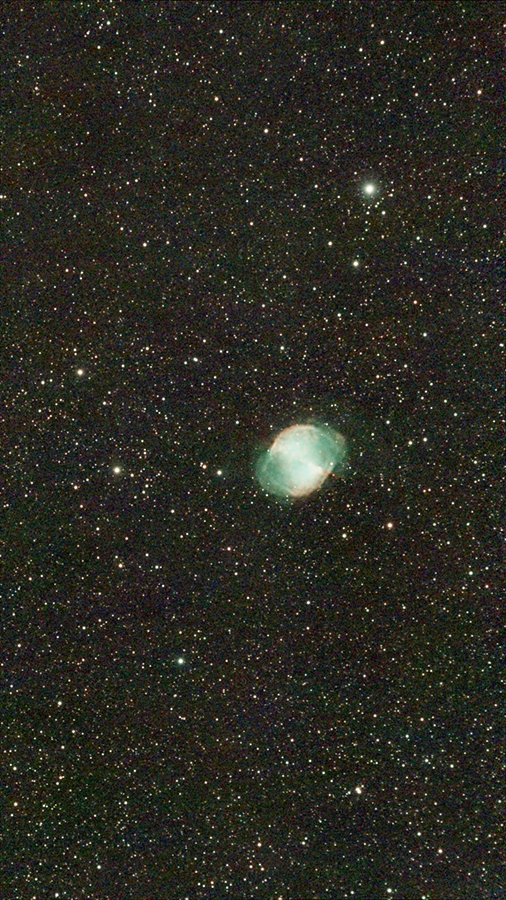
M27
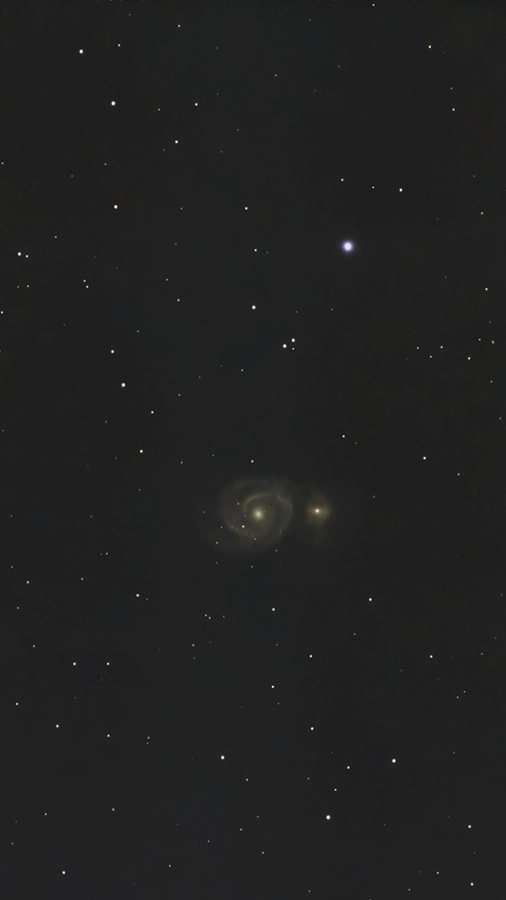
M51
About the Author: Warren Bracewell
Warren Bracewell is an amateur astronomer and former president of the Brazos Valley Astronomy Club in College Station, TX. Warren is active in the Outreach program and enjoys sharing his knowledge with others.
FIND US ON THE WEB:
www.brazosvalleyastronomyclub.org
© Brazos Valley Astronomy Club
Newsletter Editor: Ginger Wentrcek
MEMBERSHIP QUESTIONS:
brazosvalleyac@gmail.com
Treasurer - Lee Smith